第三节:标准流与浮动流
在上一节中,我们进行了照片墙的规划后,得到了如下效果:
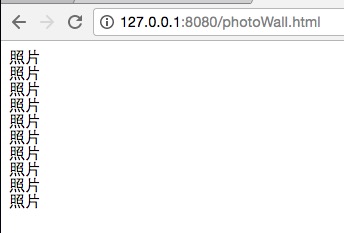
原因是由于div默认的独占一行。由于每个div独占一行,所以div最终将自上而下的进行排列,当我们回想第二章中做的个人简介时,也能够充分的看到这点。无论我们在一行中写入的内容多与少,其均独占一行。
比如下图中,我们在一个大盒子中建立了三个小盒子。虽然每个盒子的宽度都没有占满一行,但是其没有占满的空间却不能被下面的盒子所使用。我们把div的这种独占一行,自上而下的特性又称为标准流。
<div style="background-color: #eee">
    <div style="background-color: red;height: 100px;width: 200px;color: #fff;">div1</div>
    <div style="background-color: green;height: 100px;width: 300px;color: #fff;">div2</div>
    <div style="background-color: yellow;height: 150px;width: 600px;">div3</div>
</div>与标准流相对应的,叫做浮动流。使用float属性。我们可以在菜鸟教程获取更多关于浮动流的知识,也可以google — CSS 浮动,来获取更多的信息。浮动流,顾名思义,就是将盒子浮起来。
下面,让我们共同来看看两个盒子浮动起来是个什么样子。
<div style="background-color: #eee">
    <div style="background-color: red;height: 100px;width: 200px;color: #fff;float:left">div1</div>
    <div style="background-color: green;height: 100px;width: 300px;color: #fff;float:left">div2</div>
    <div style="background-color: yellow;height: 150px;width: 600px;">div3</div>
</div>我们看到,div3被浮动起来的div1,div2挡住了一部分。这是由于div1,div2是浮动流,而div3是标准流。标准流这个瞎子,是看不到那两个飘在空中的浮动流的,所以对于div3而言,div1、div2并不存在。在假设div1,div2不存在的情况下,div3当然就又固执的出现在了它本该出现的位置上了。
结论:标准流的盒子是看不到同级别的浮动流盒子的。
其实,不止对于同级别的div3来说,div1,div2是不存的。对于父级别的div也同样看不到两个浮动起来的盒子。我们来减小一下div3的高度:
<div style="background-color: #eee;">
    <div style="background-color: red;height: 100px;width: 200px;color: #fff;float:left">div1</div>
    <div style="background-color: green;height: 100px;width: 300px;color: #fff;float:left">div2</div>
    <div style="background-color: yellow;height: 80px;width: 600px;">div3</div>
</div>
我们通过观察父盒子的背景色范围不难发现,父盒子的高度与div3相同。也就是说,尽管div1,div2也有一定的调试,但父盒子只会考虑标准流的div3来设置自己的调试。对于标准流的父盒子而言,两个浮动流的div就和不存在一样。
结论:标准流的父盒子是看不到位于其中浮动流的子盒子的。
那么当我们并不希望div1,div2覆盖div3时怎么办呢?
clear
盒子模型中的clear用来解决这个问题,译为中文为:清除。
我们div3由于被div1,div2覆盖住,从而影响了表现效果。而使用clear属性,便可以清除由于它们带来的影响。
<div style="background-color: #eee;">
    <div style="background-color: red;height: 100px;width: 200px;color: #fff;float:left">div1</div>
    <div style="background-color: green;height: 100px;width: 300px;color: #fff;float:left">div2</div>
    <div style="background-color: yellow;height: 80px;width: 600px;clear: left;">div3</div>
</div>clear:left; — 清除浮动流的左浮动给自己带来的影响。
此时,由于清楚了浮动流中的左浮动给其带来的影响,div3就像看到了div1,div2一样,乖乖的位于两个div的下方了。
注:除上述方法外,我们还可以设置父盒子的overflow属性来解决该问题,segmentfault中也有人对这个问题进行讨论。
总结:
本节中,我们对标准流和浮动流有了基本的认识,并结合clear属性,来实现动态的布局。
参考: 菜鸟教程 w3cshool在线 w3schools